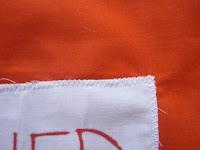
I work with an autistic child and it is useful to have clear endings to activities so I made him a 'Finished' bag where we can put things we have finished doing (e.g. when we finish playing with the ball, it goes in the finished bag). You could make something similar for a toddler maybe or just make a drawstring bag for anything (PE kit, swimming bag, laundry bag).
This is probably one of the simplest things to make.
1. Cut a big rectangle of fabric, a couple of centimetres wider than you want your bag to be (wh
en the fabric is folded in half of course) and about 10cm longer than you want it to be.
2. Make the label - cut a piece of plain fabric for the label (I used white so it was really clear) and use a sharpie to write on it. Sew this onto your fabric using a zig-zag stitch around the edge.
3. Fold over a double seam along the top (wide enough to put your cord through) and iron it flat. Then sew it up. I used two lines of stitching for this bit.
4. Fold your fabric right sides together and sew along the bottom and side seams.
That's it! It took me about half an hour one Saturday afternoon, and I'm not that fast!


No comments:
Post a Comment