

These decorated candle jars are so easy to make and look fantastic just about anywhere. Although any old plain jar can look quite nice with a candle in, these are a little more colourful, and the designs on the jars create different patterns in the candle light around the jars when they are lit which is nice. I recently did this with a group of kids ranging from 3 to 13 and all of them managed to create something that looked really good, so its a great craft activity to do if you have children as well!

You will need...
* Clean jars
* Various tissue paper
* PVA glue (mixed with a little water)
* Glass paint (optional)
* Small paint brushes
* Scissors
* Scrap white paper (to put inside the jars)
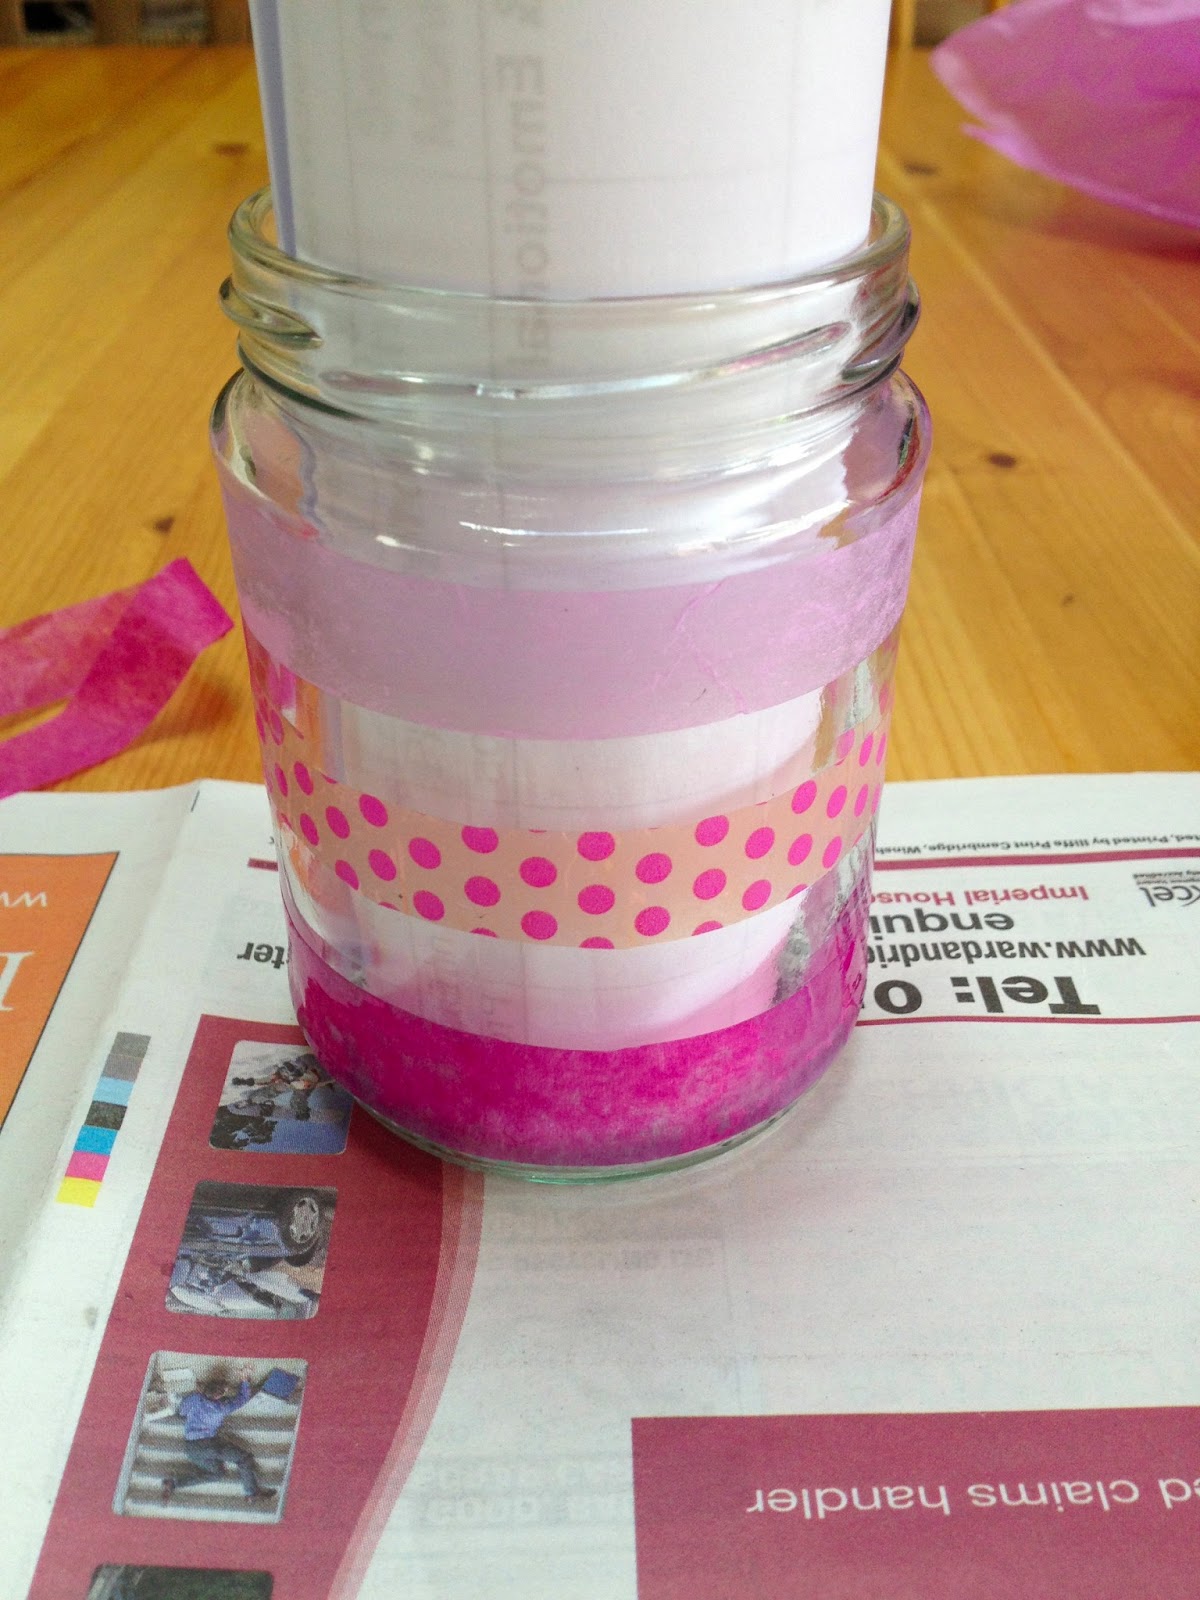
1. Start with your clean jars. A good trick is to roll up some white paper and put it inside the jars so that you can see what you're working on a little better.

2. Before you start, mix your PVA glue with just enough water to make it runny (and mine went a bit frothy as well!), like this...

3. So now you can start getting creative. On my first jar, I cut out strips of tissue paper to stick on.

4. Then lay the strips out and paint a thin layer of glue on the back.

5. The trickiest bit about the whole process is transferring the tissue paper onto the jar, because once it has glue on, it gets very easy to tear (as I learned the hard way!). So be as gentle as possible, and lay it on the jar. It should look like this...

and then just carry on...

6. I also decided to add a little glitter to my jar (surprise surprise!) and once the tissue paper is dry you can use any paint over the top ( good if you don't have glass paint).

And here is the finished thing!


I also did two other jars, one with stars cut out in tissue paper, which is a little more subtle, and one using both tissue paper and glass paints.
Being a little artistically challenged, I printed out a star template to use..


And here they are. They look a lot better in the dark with a candle in!


Enjoy! :)
xoxo
No comments:
Post a Comment